Overview
Today we will be going over, how to create a business email using Microsoft Office 365. This is for business professionals looking to set a reliable and secure foundation for their business. Microsoft Office 365 facilitates business growth by allowing business owners to select different business plans that include the Microsoft Office Apps and Device Management.
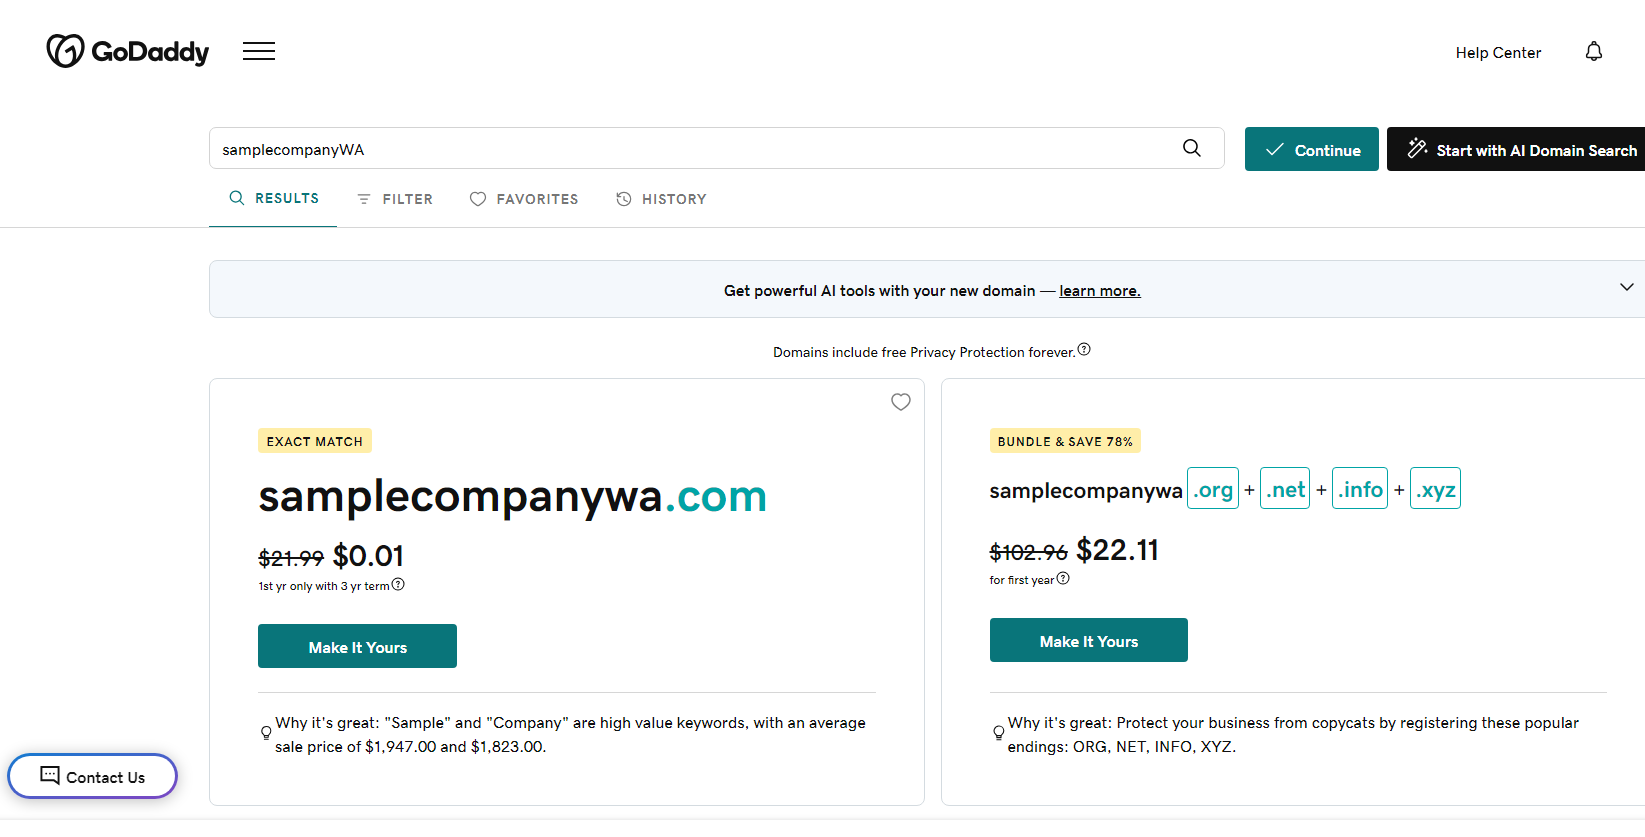
Step 1. Buy Domain
If you already have a company website or a different domain name that you would like to use then you can skip this step. However, for those who do not have a domain, step number 1 will be to get a company domain name. You can go to any domain name registrar website (like GoDaddy, Bluehost, Namecheap) and select a domain name that is not taken.
Note: You can purchase the domain from a partner suggested by Microsoft, but I suggest using an independent reliable registrar like GoDaddy. This will make things easier when working with website developers.
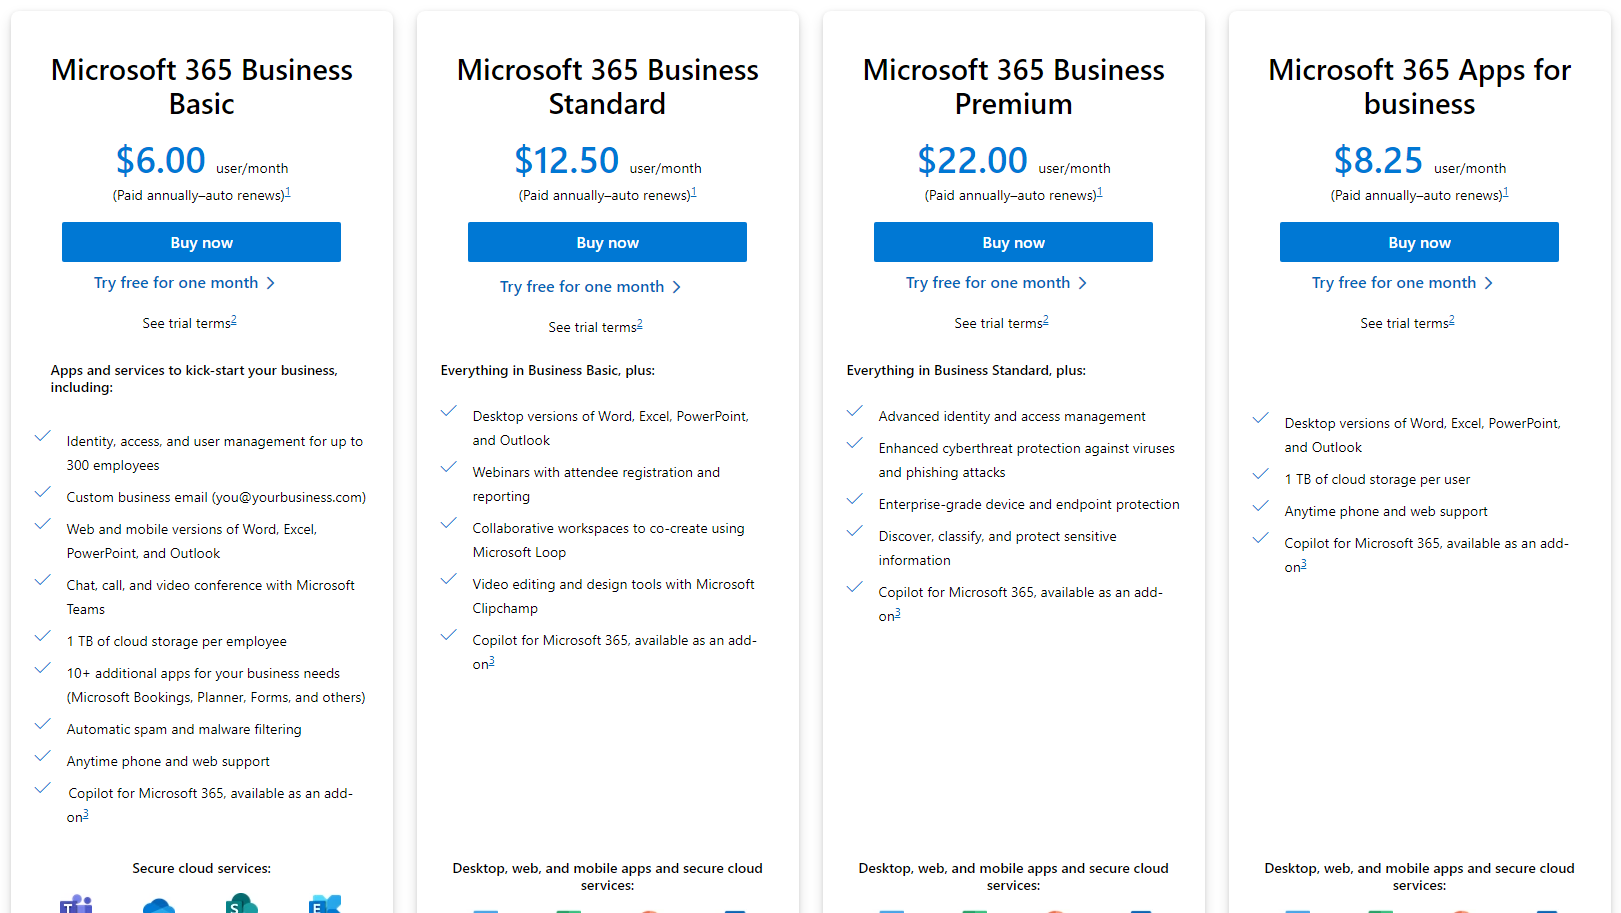
Step 2. Select Microsoft 365 Plan
Go to Microsoft.com and find the “Plans and pricing” page or click here to select your plan. For a business who just started and doesn’t have the need to the business apps on their desktop, then Microsoft 365 Business Basic is the perfect plan. On the other hand, for a business that is more developed and has a need for desktop apps, then Microsoft 365 Business Standard would be more ideal. Lastly, if a business has multiple computers and needs to have device management then Microsoft 365 Business Premium is the perfect option.
Select “buy plan” or “try free for one month” to get started.
Step 3. Enter Necessary Information
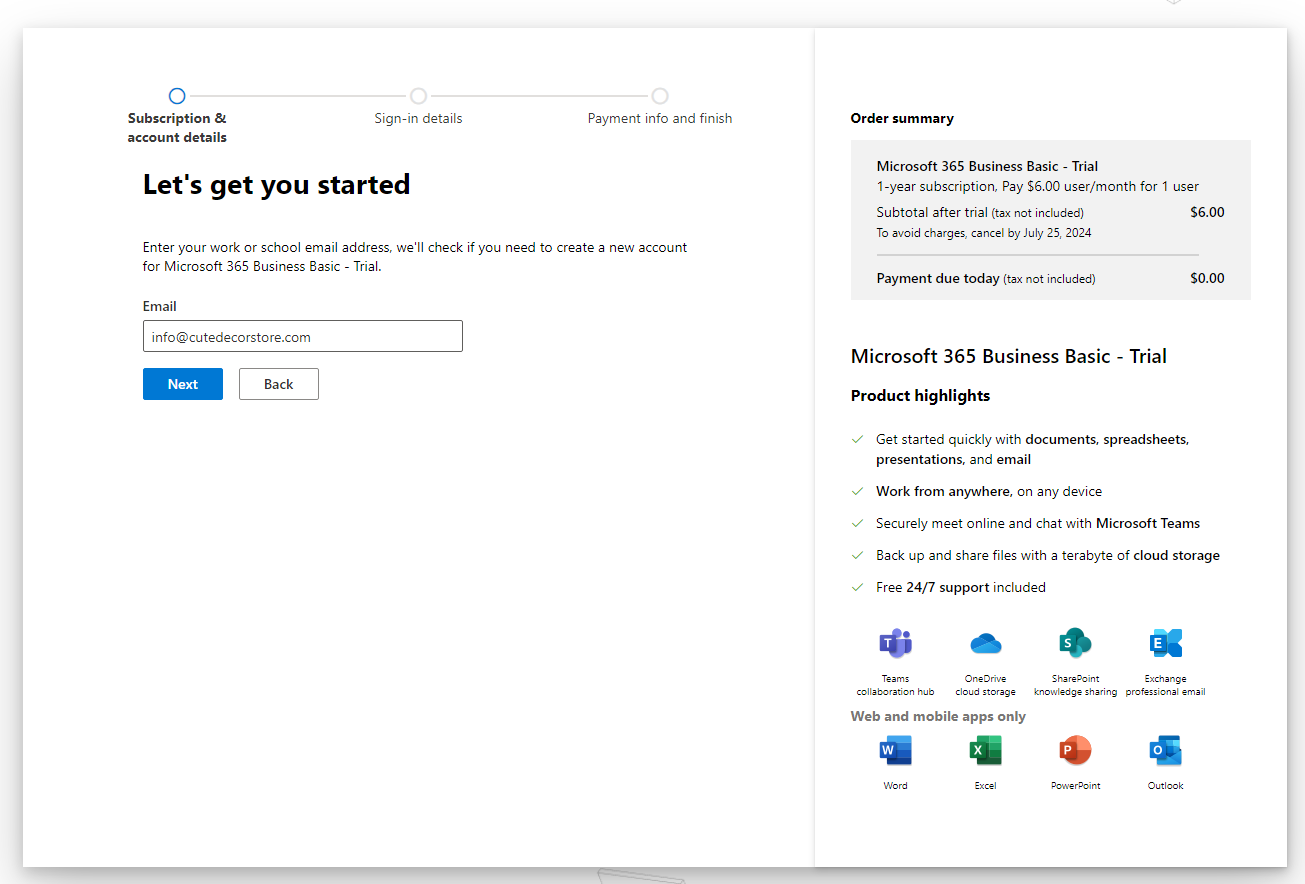
Begin filling out your information. For this example we will use a sample domain that I have purchased in the past.
The email I chose is “info@cutedecorstore.com”
After entering the desired email click next.
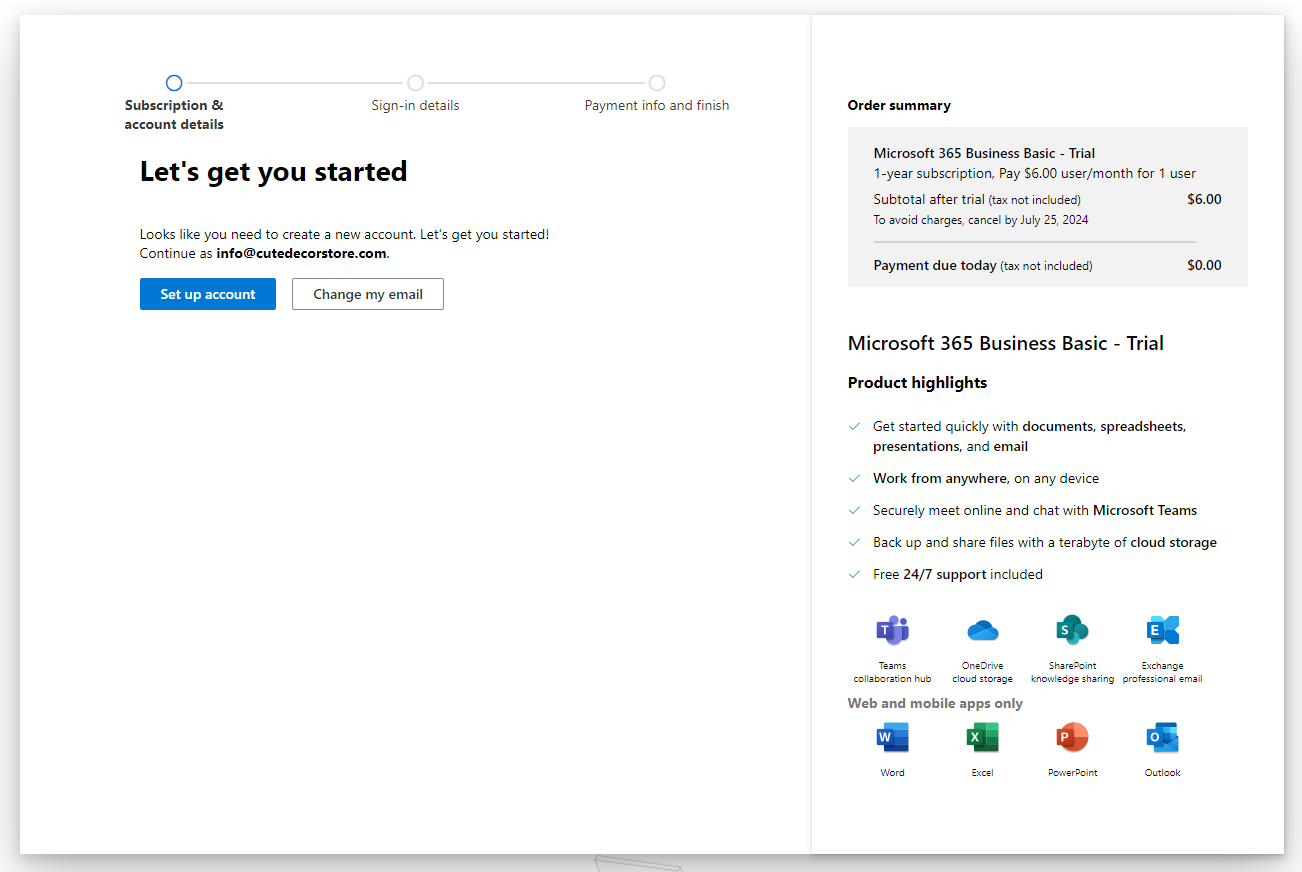
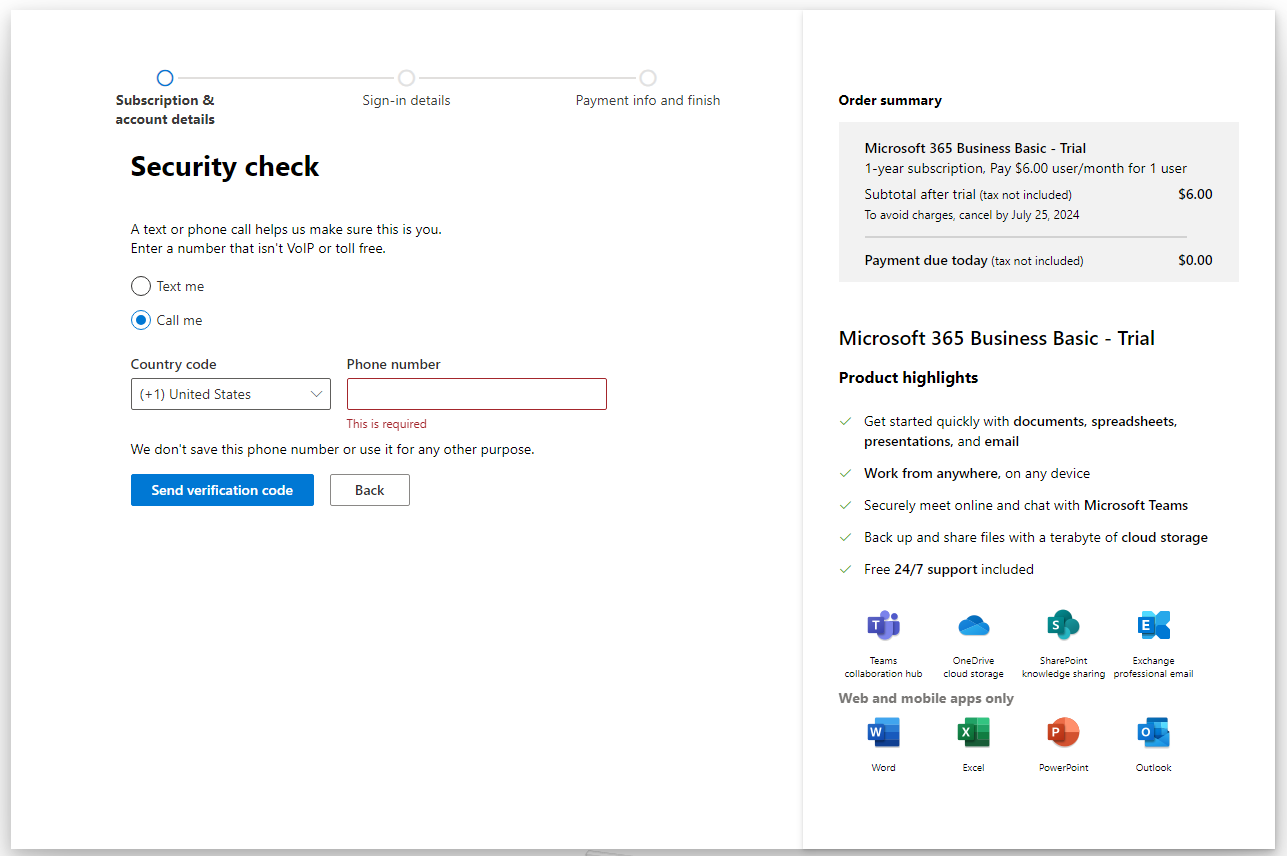
Step 4. Create Admin Email & Add Billing Information
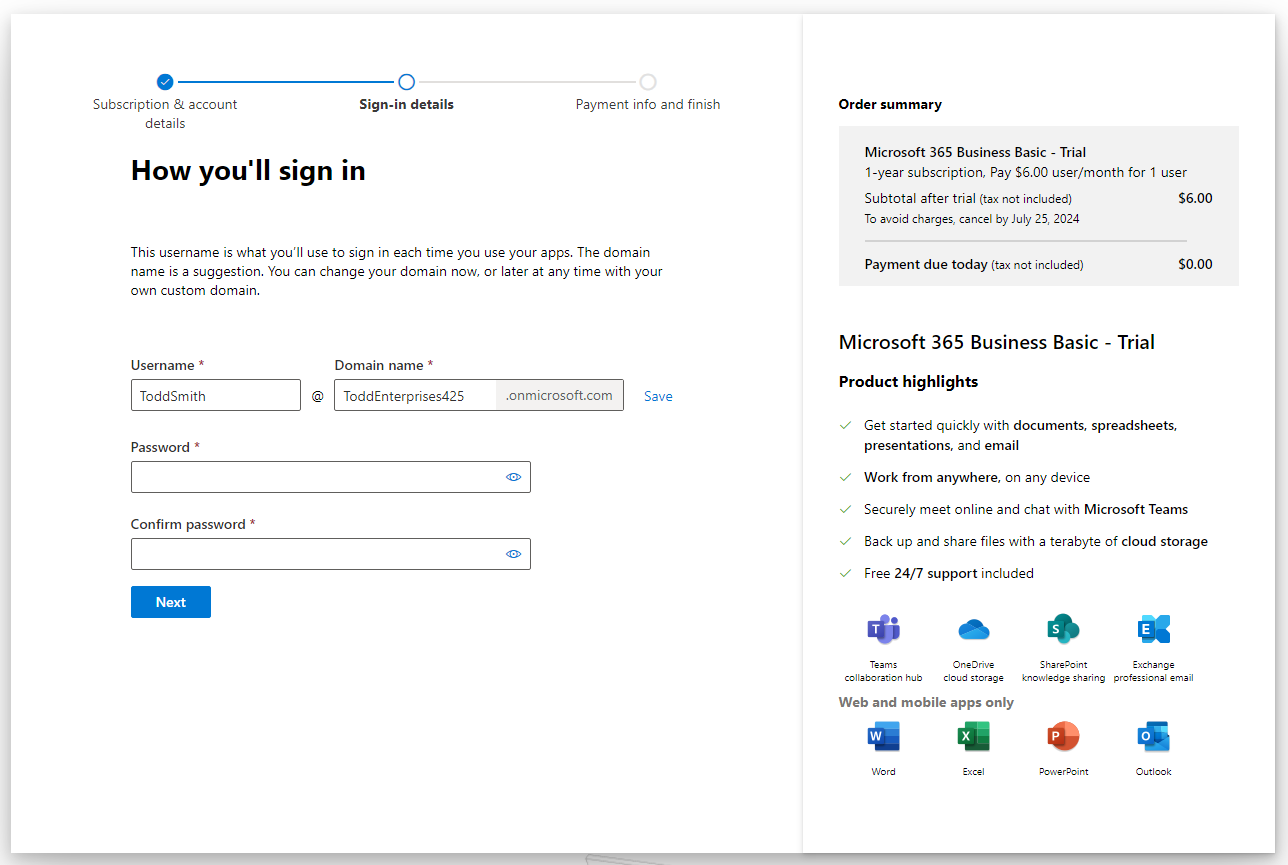
Microsoft will require you to set an admin email with an .onmicrosoft.com at the end. I prefer to keep it the closest possible to the email name I am aiming for.
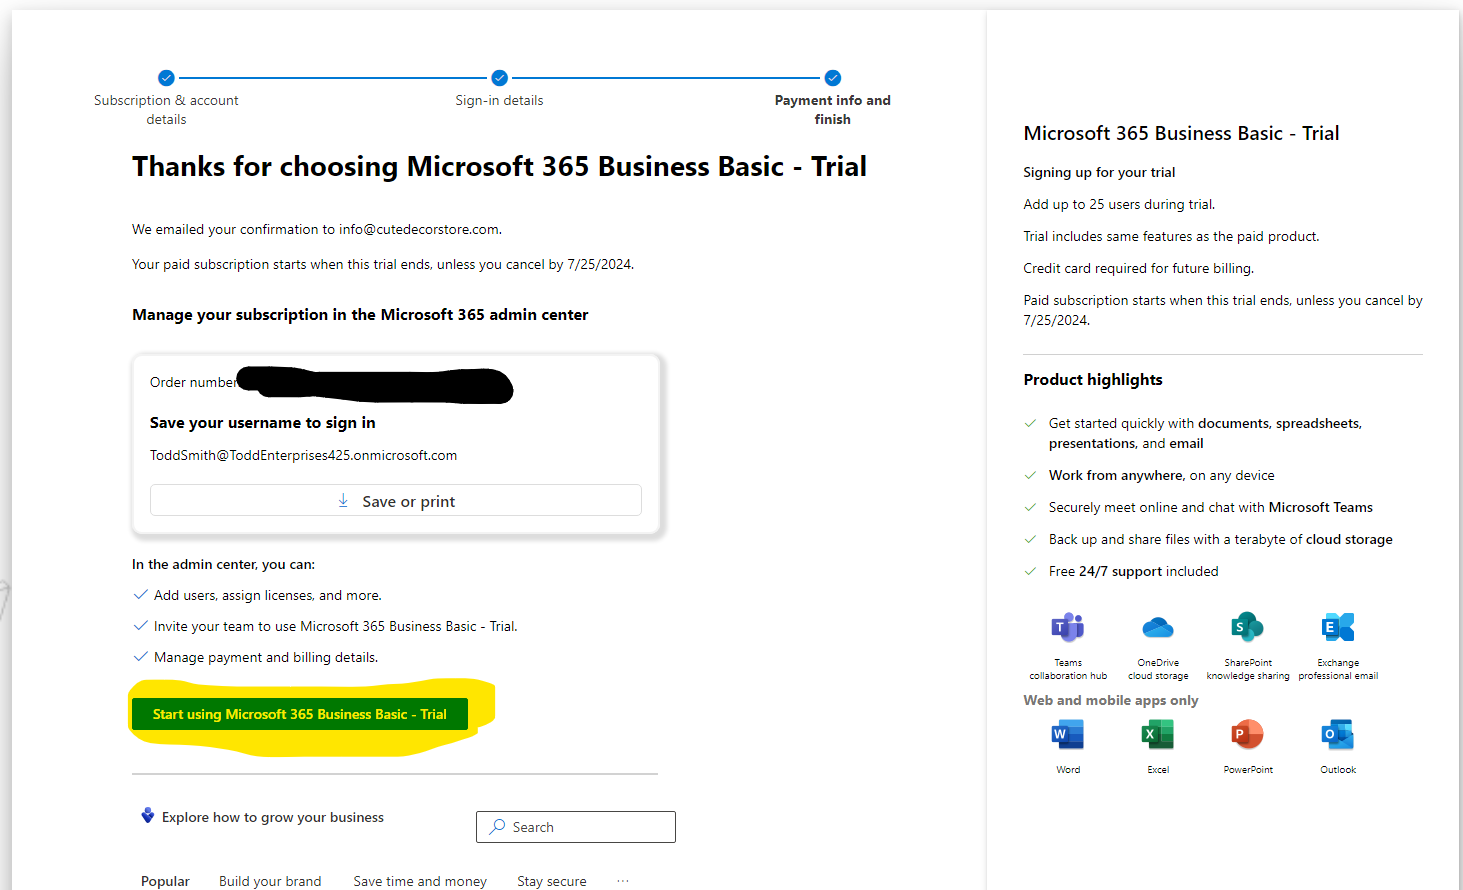
After this screen you will be ask for your billing information.
Step 5. Set Up Domain Email
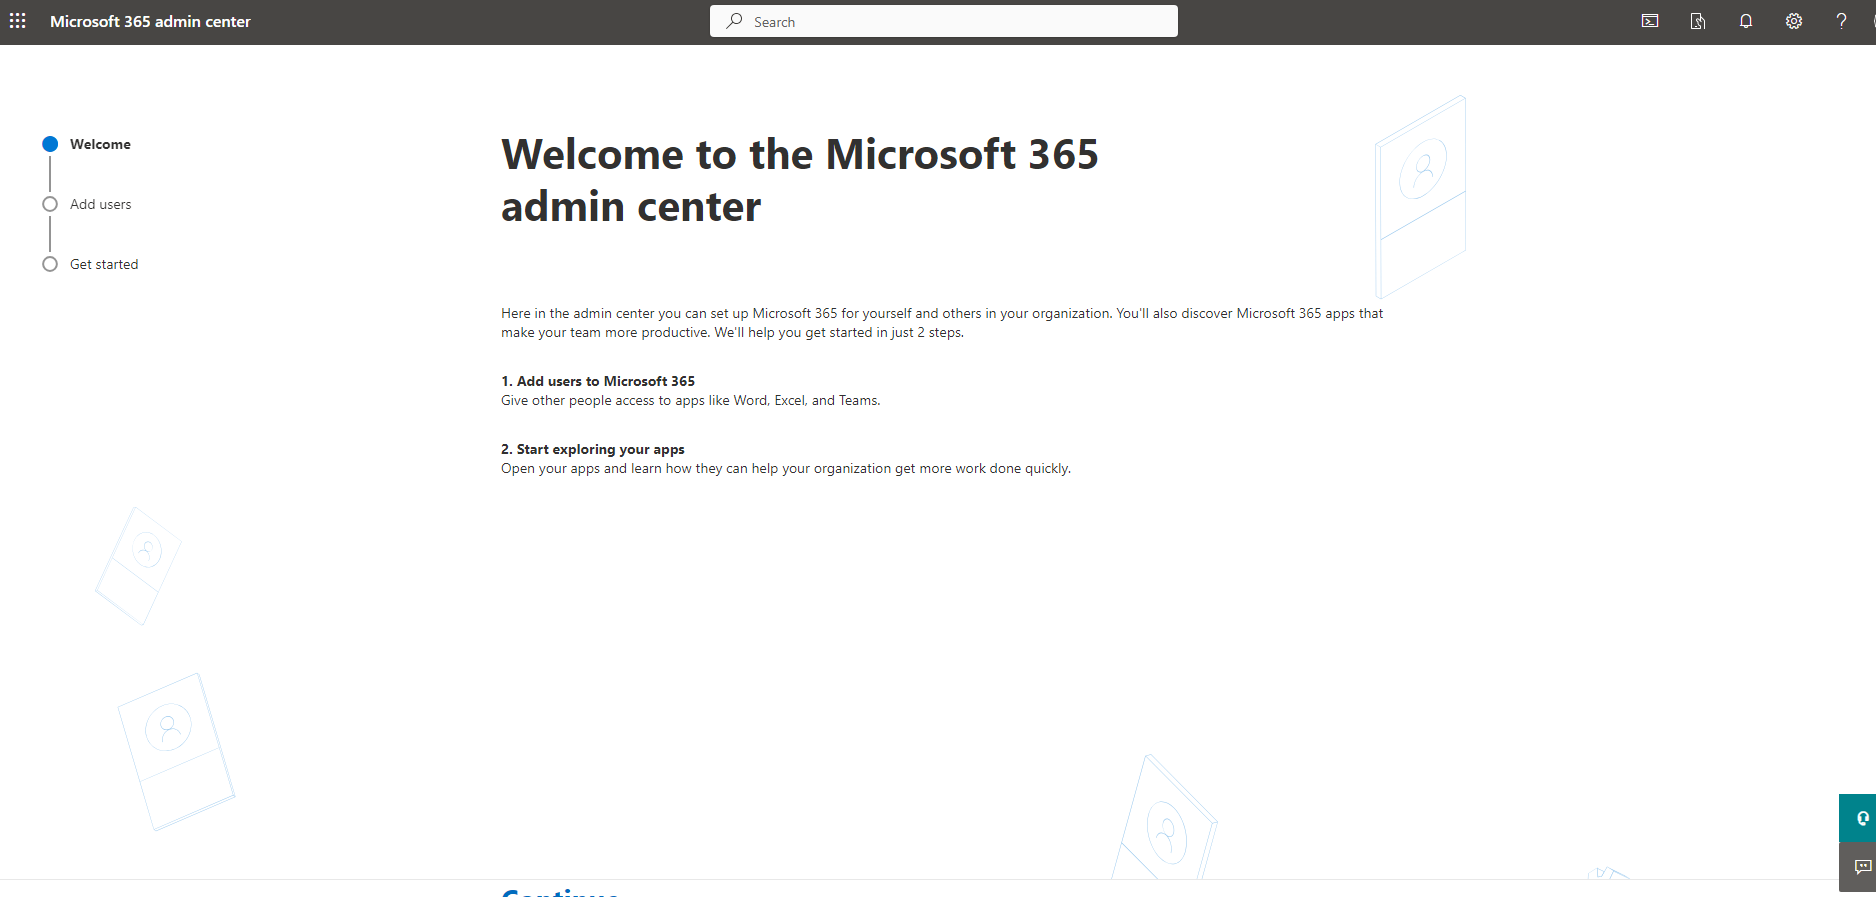
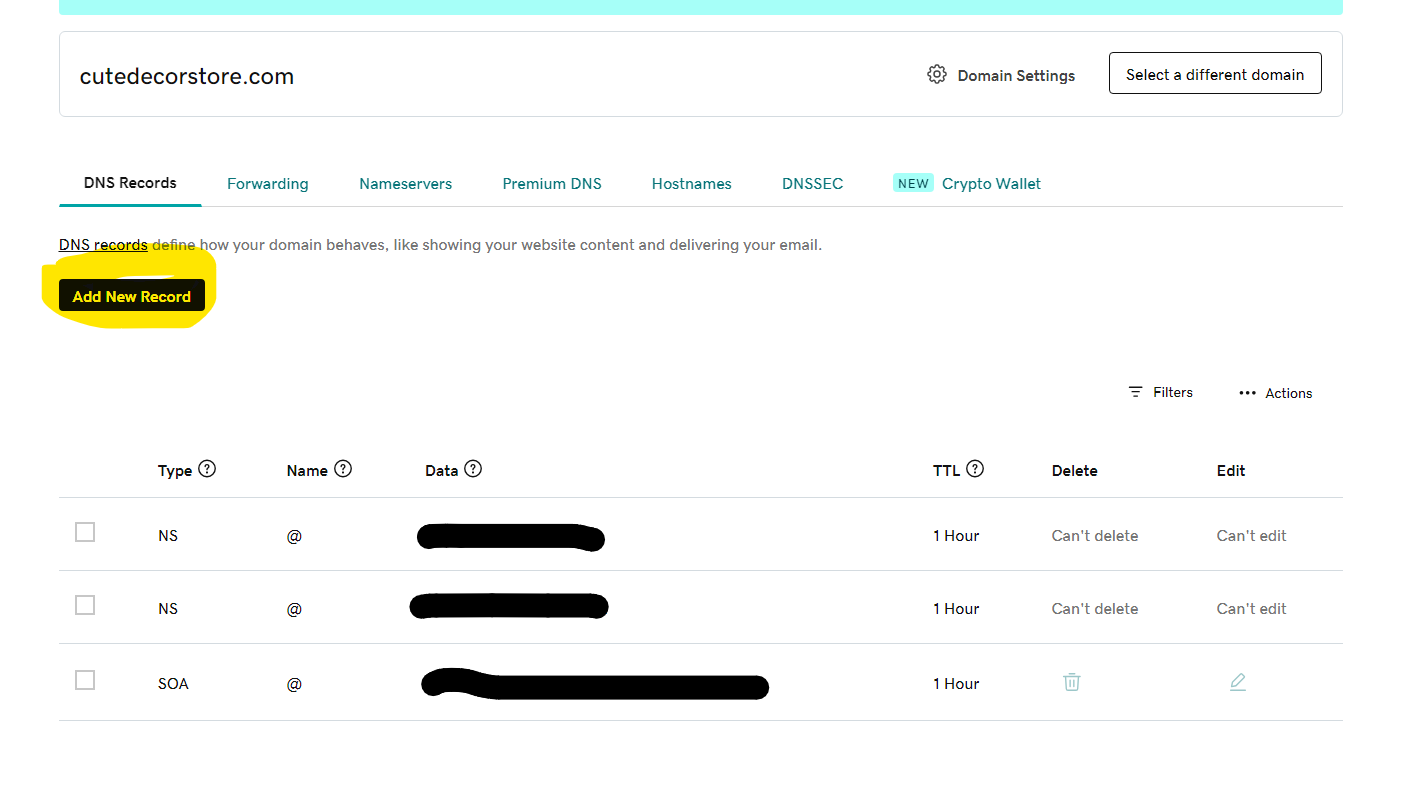
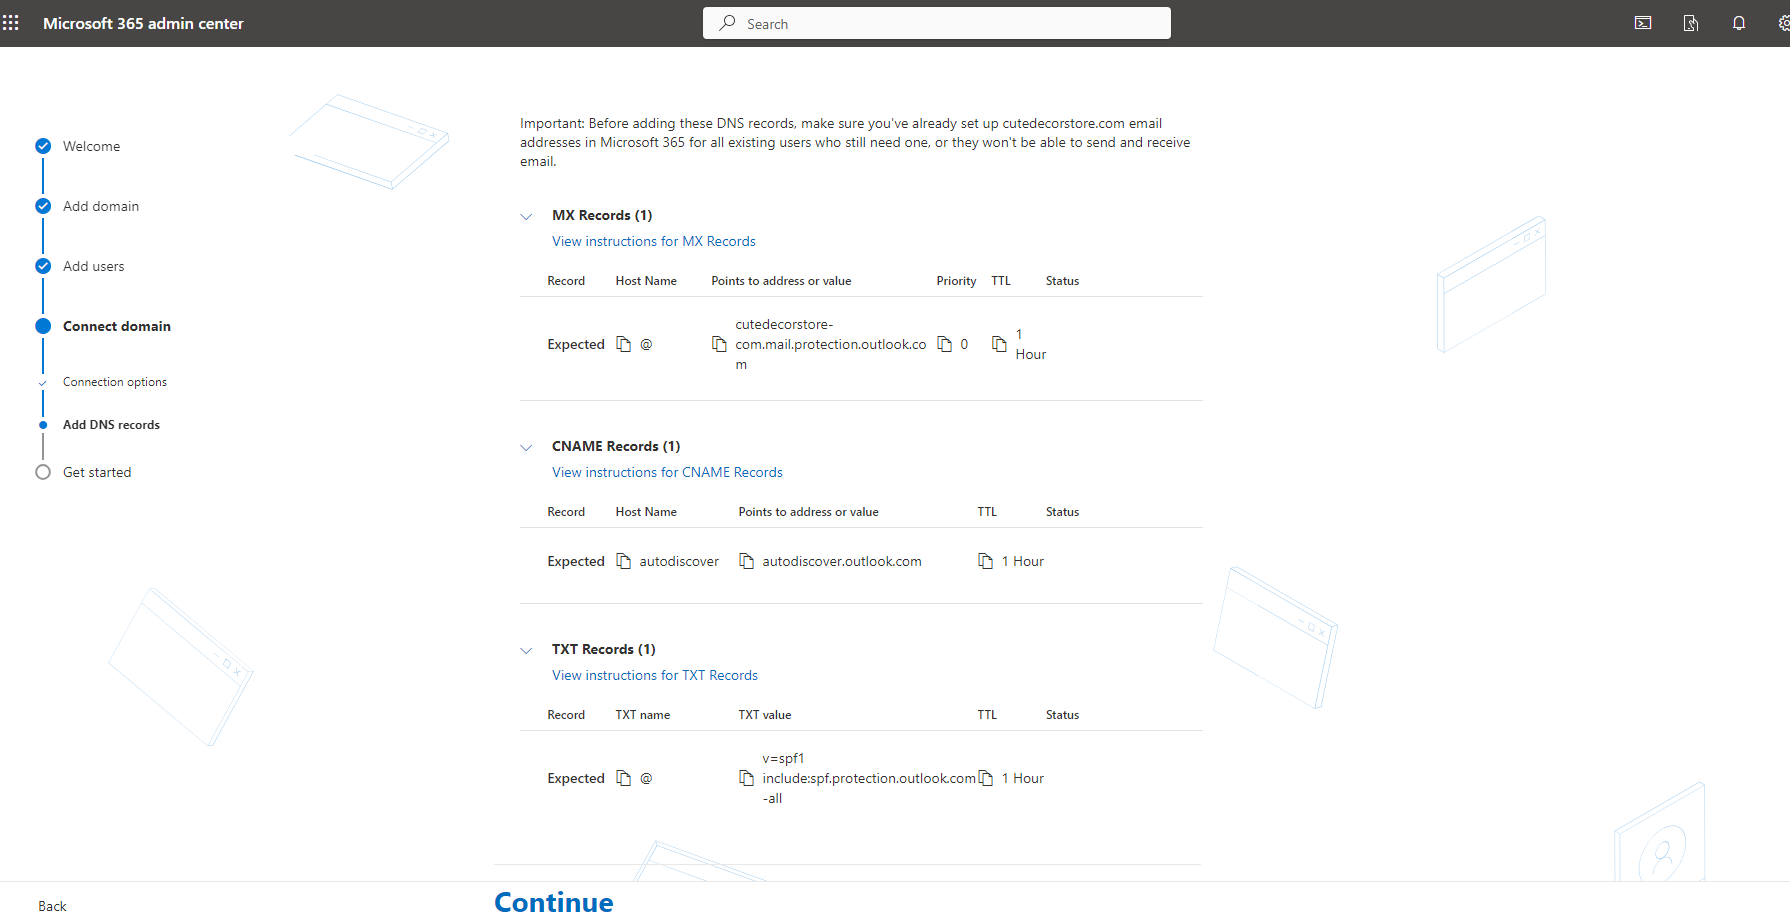
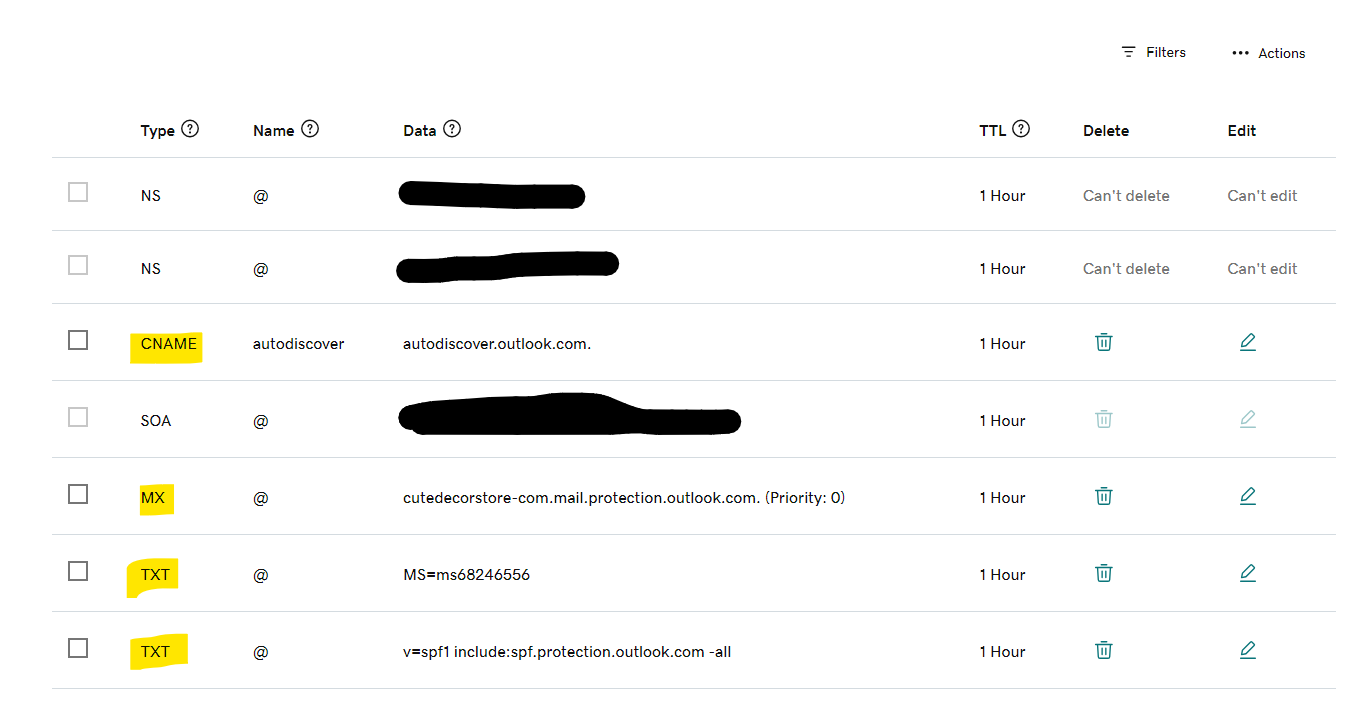
After your payment confirmation you will be sent to a screen where you can add users. However, before adding a user you will have to connect your domain by adding the DNS records provided by Microsoft. Below are the steps step by step.
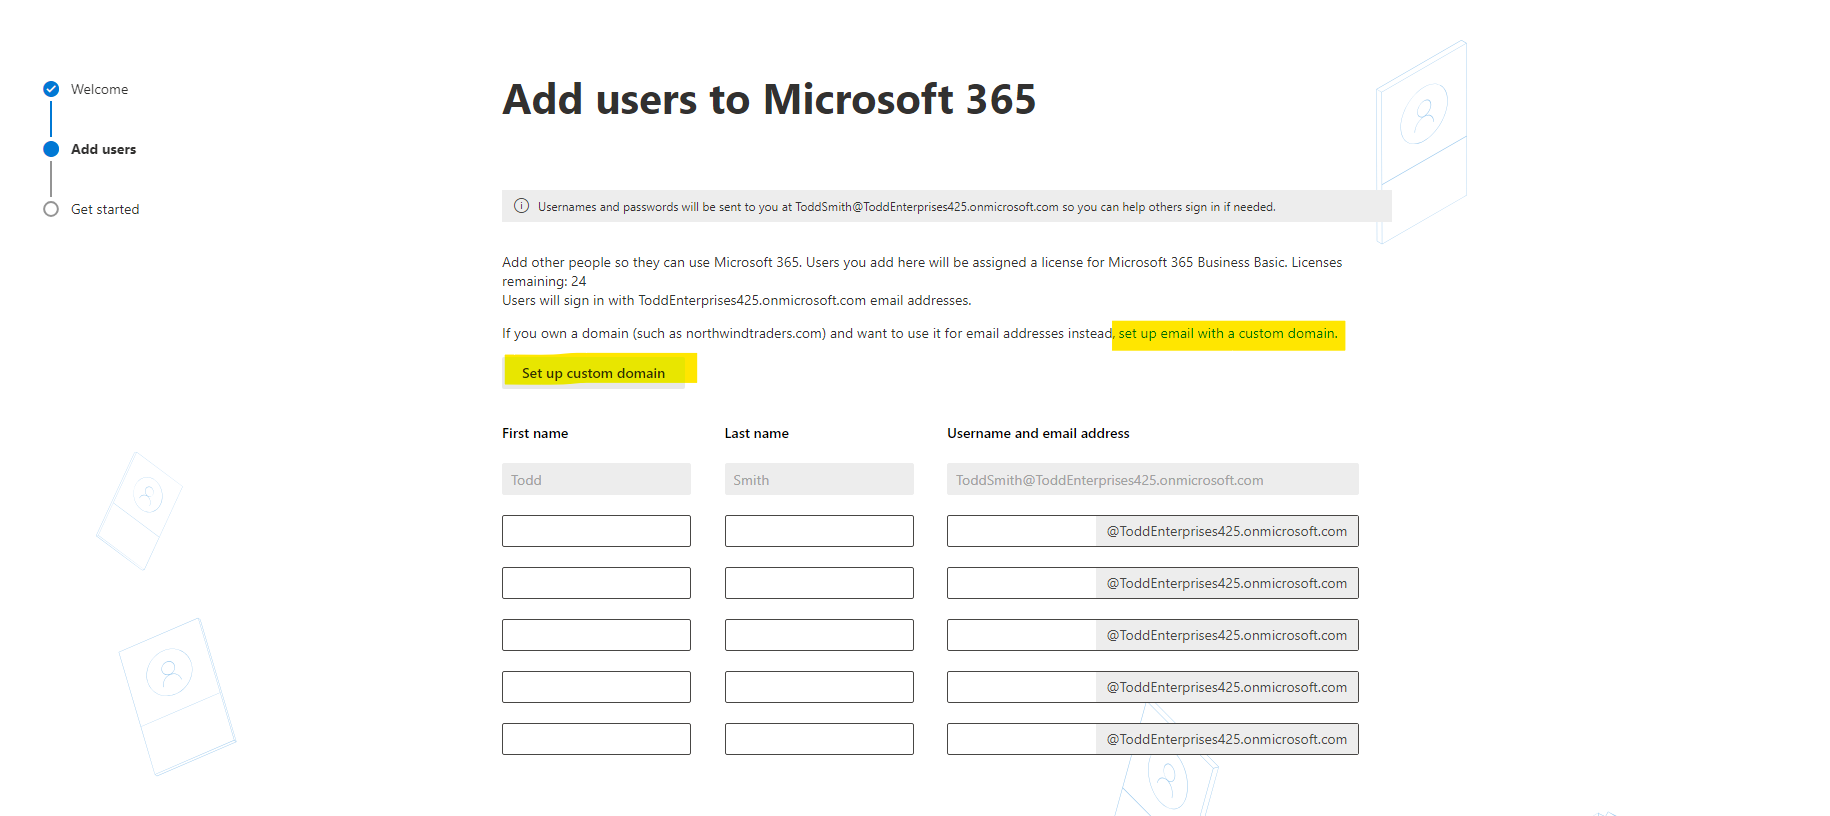
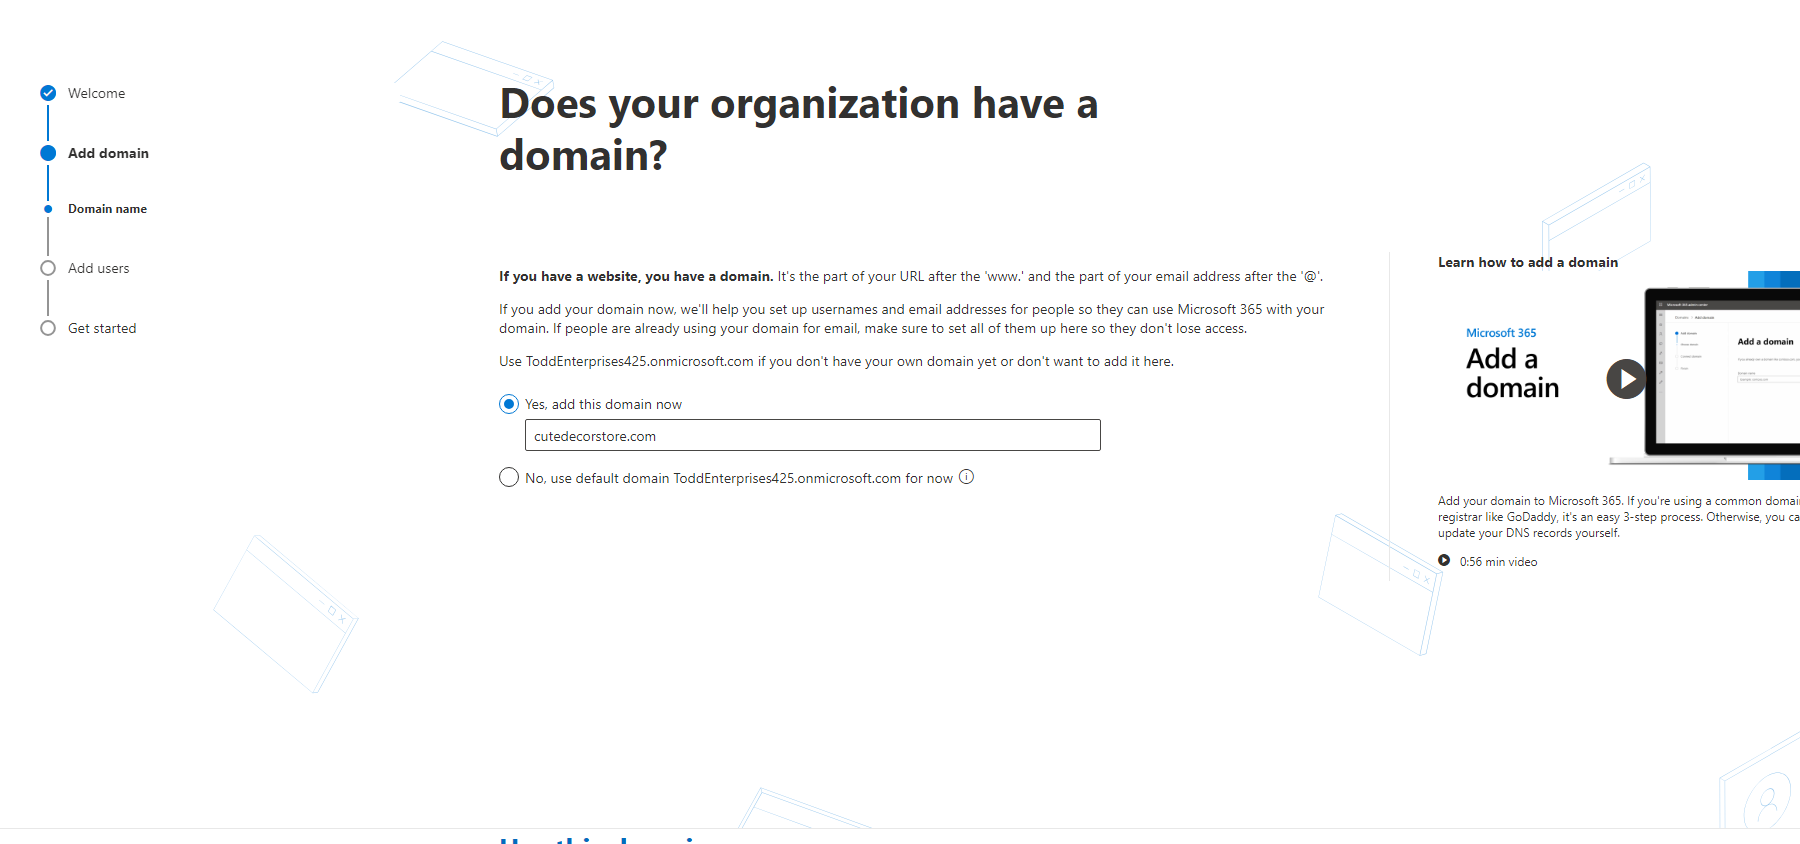
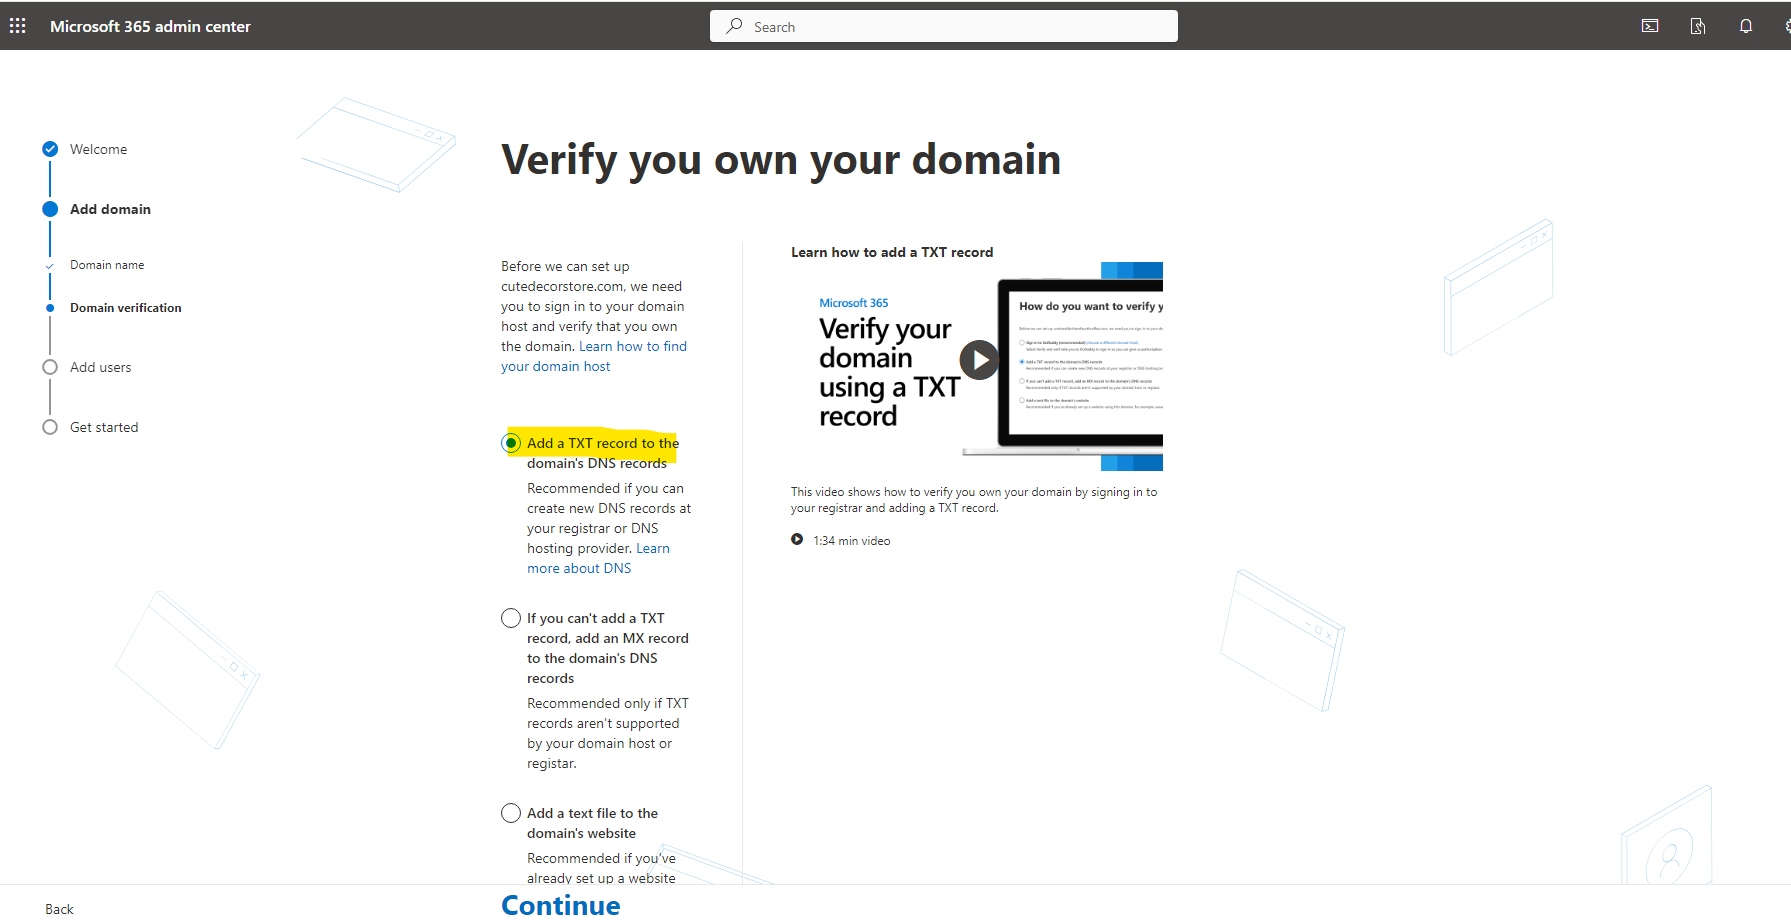
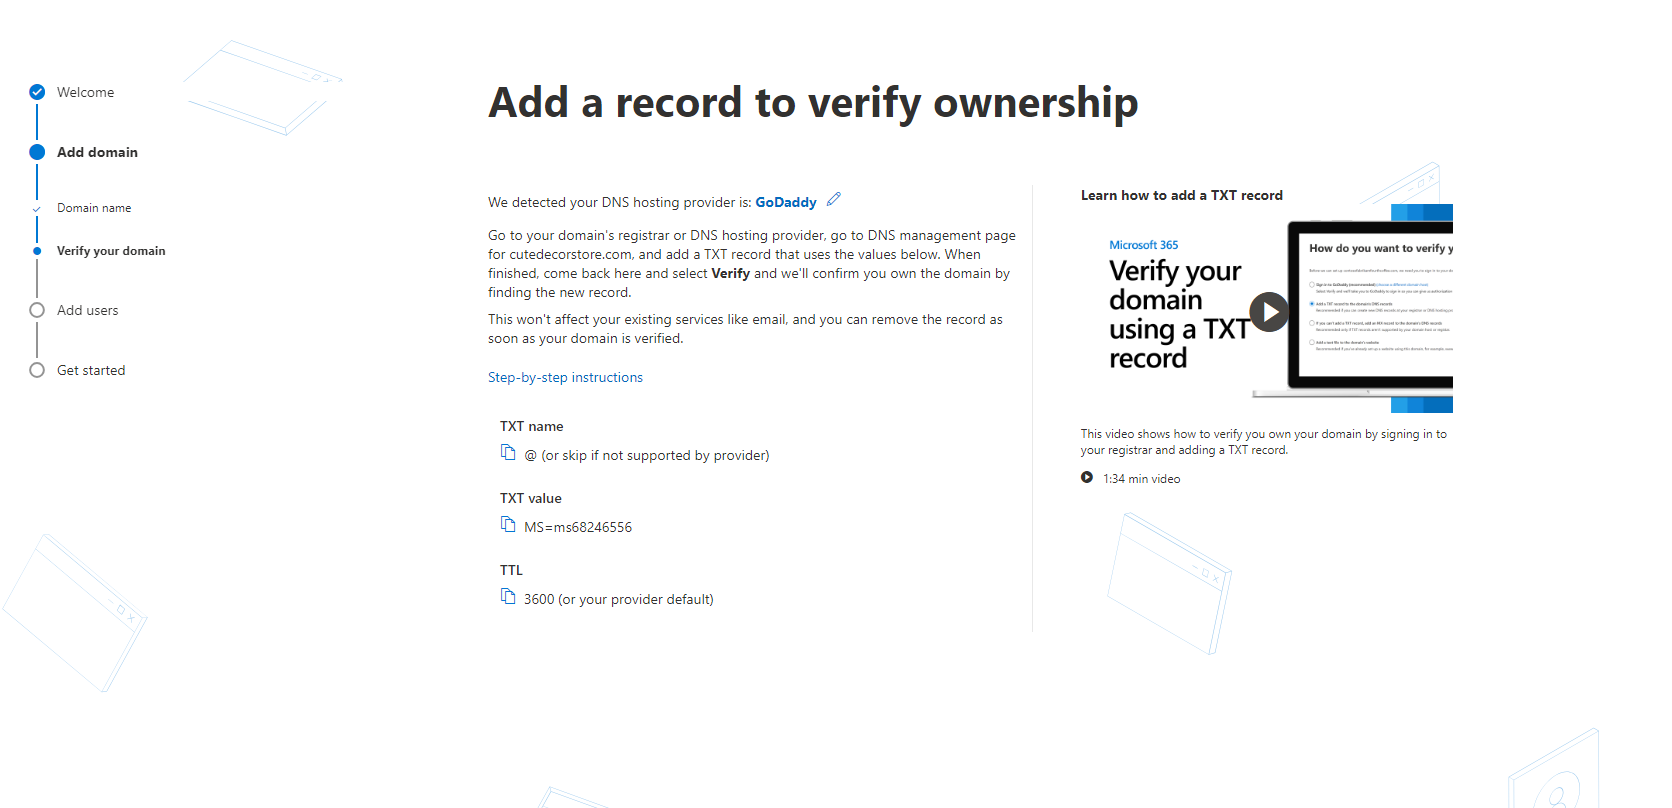
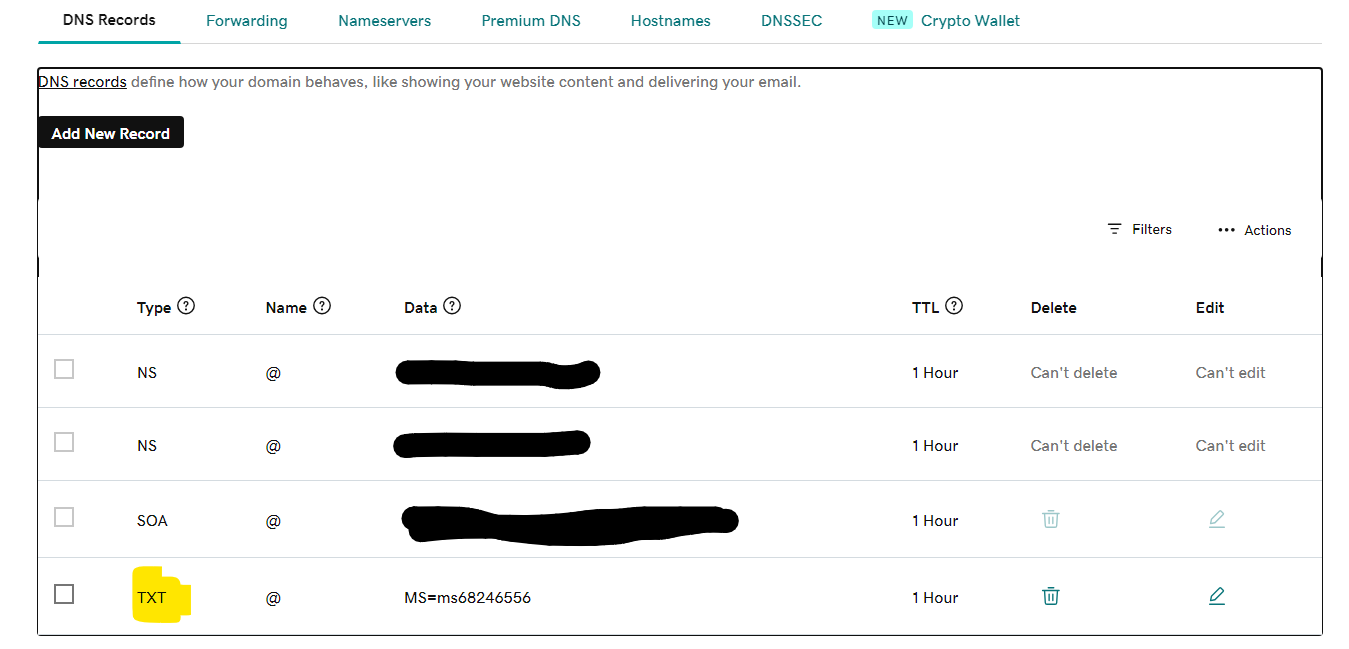
5a. Log into your GoDaddy account and go to your domains DNS settings to add the provided TXT file.
NOTE: Your TXT file will be unique to you.
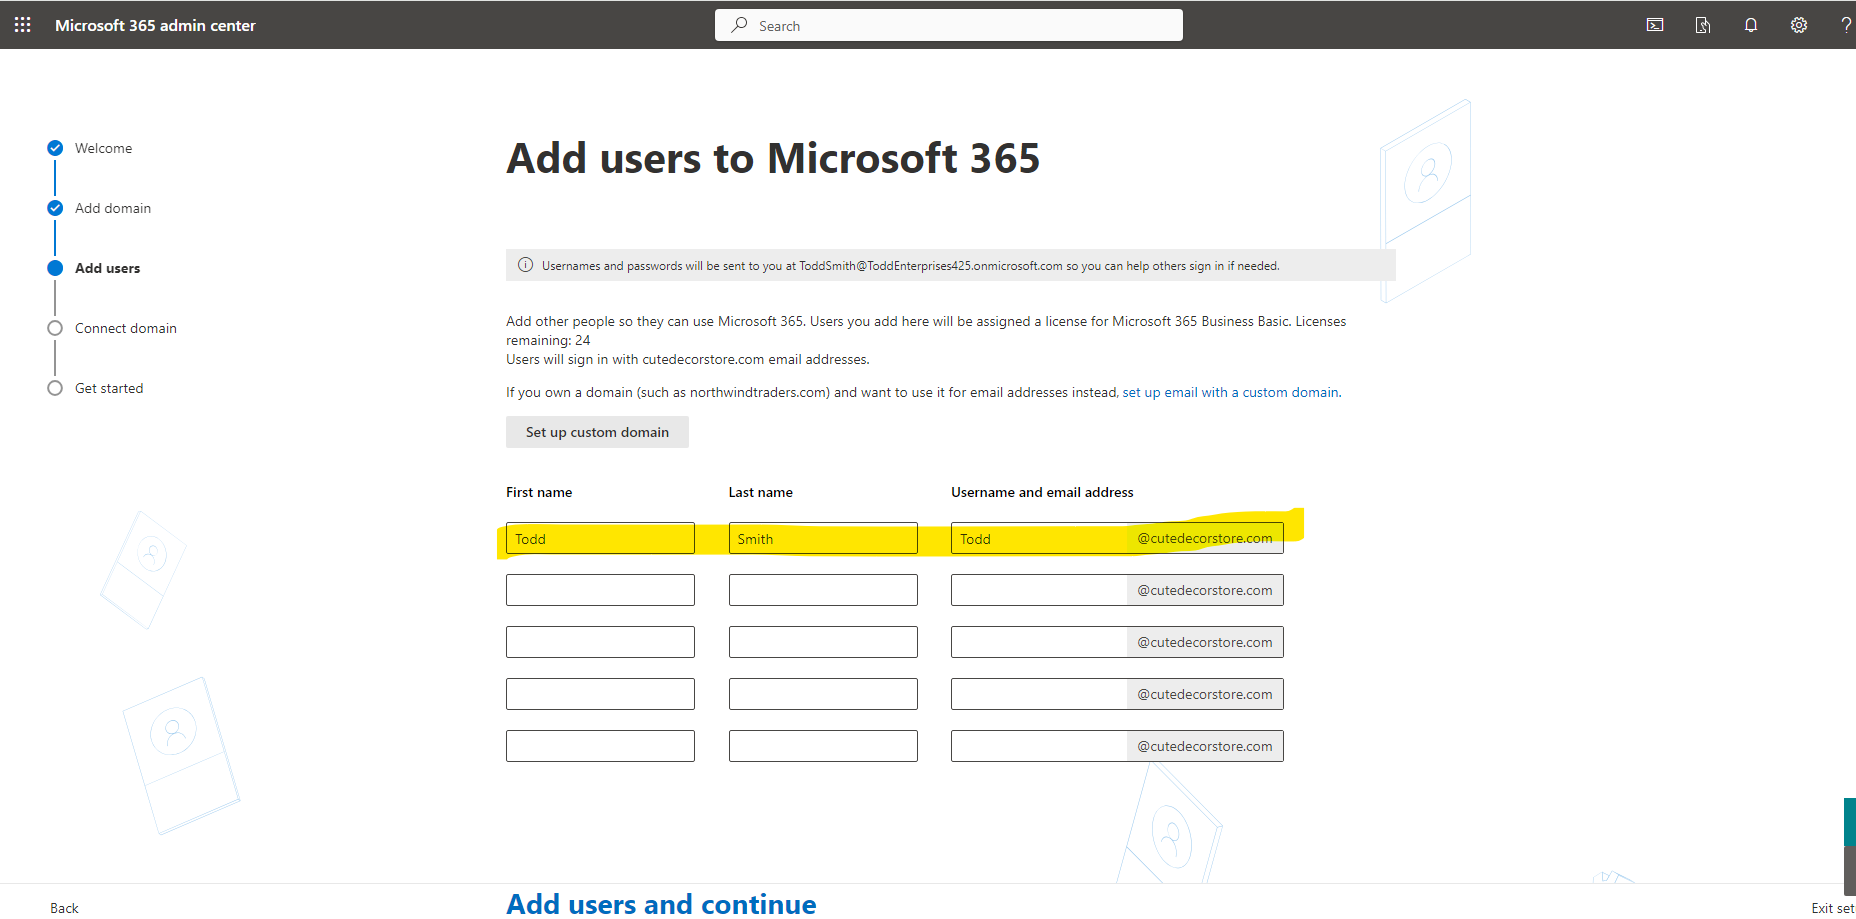
5b. Add correct email you would like with your custom domain.
5b. Enter additional DNS records provided by Microsoft
Step 6. Log Into Your New Email
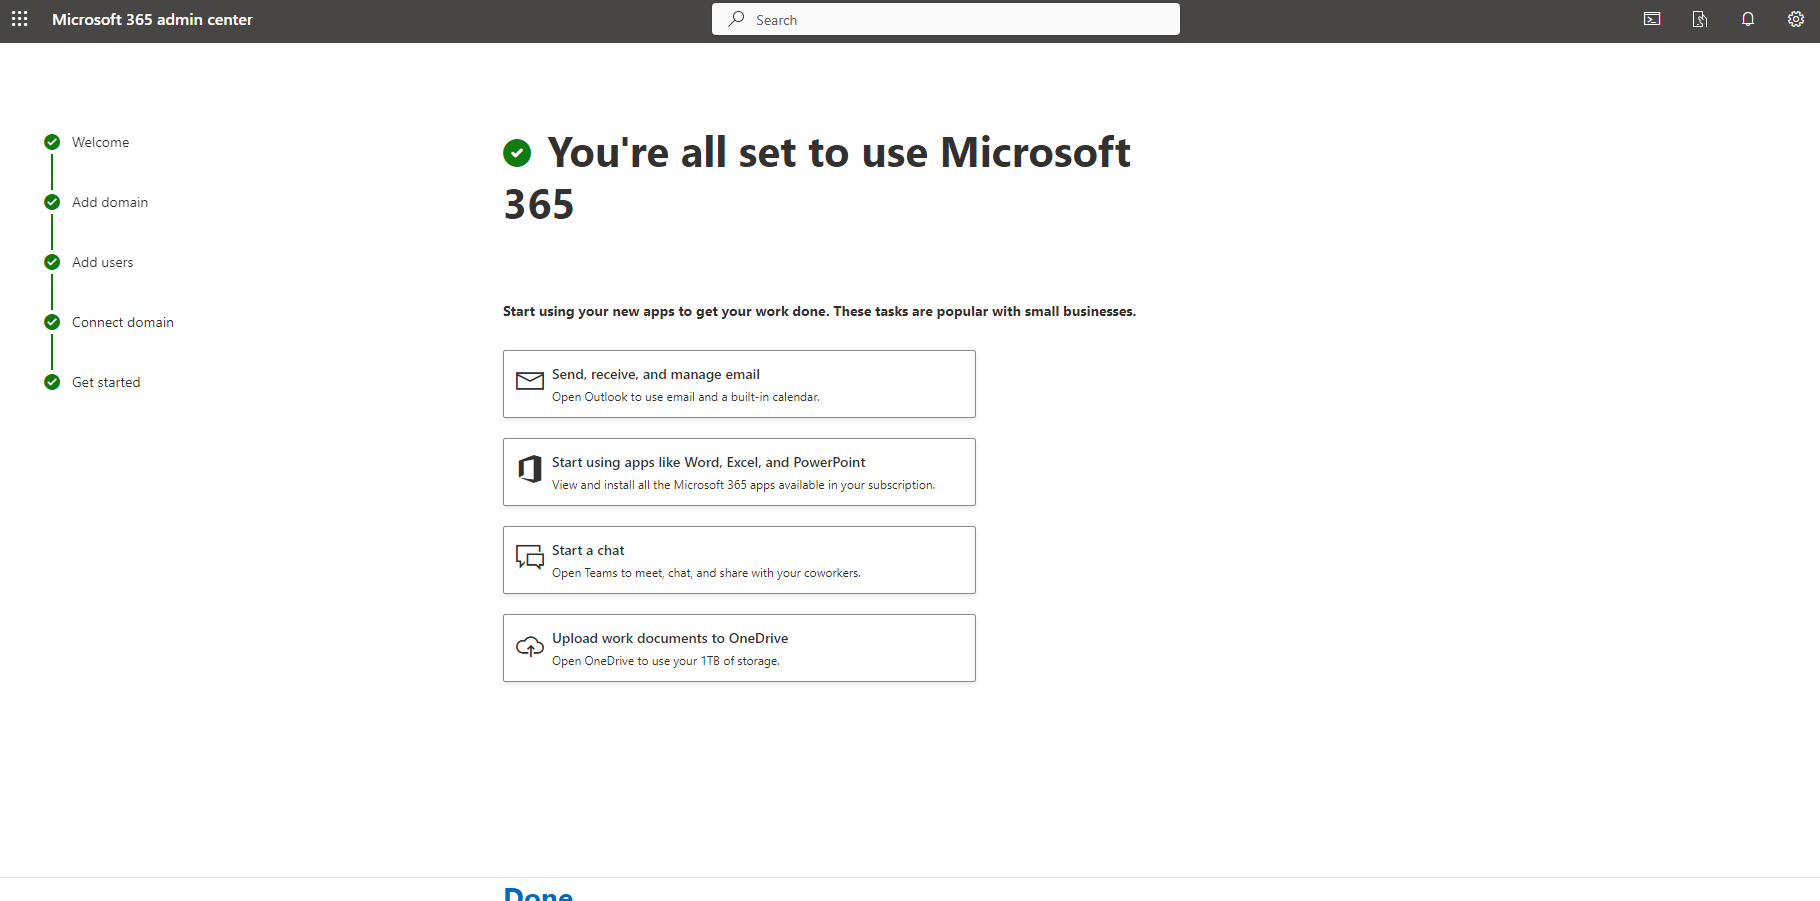
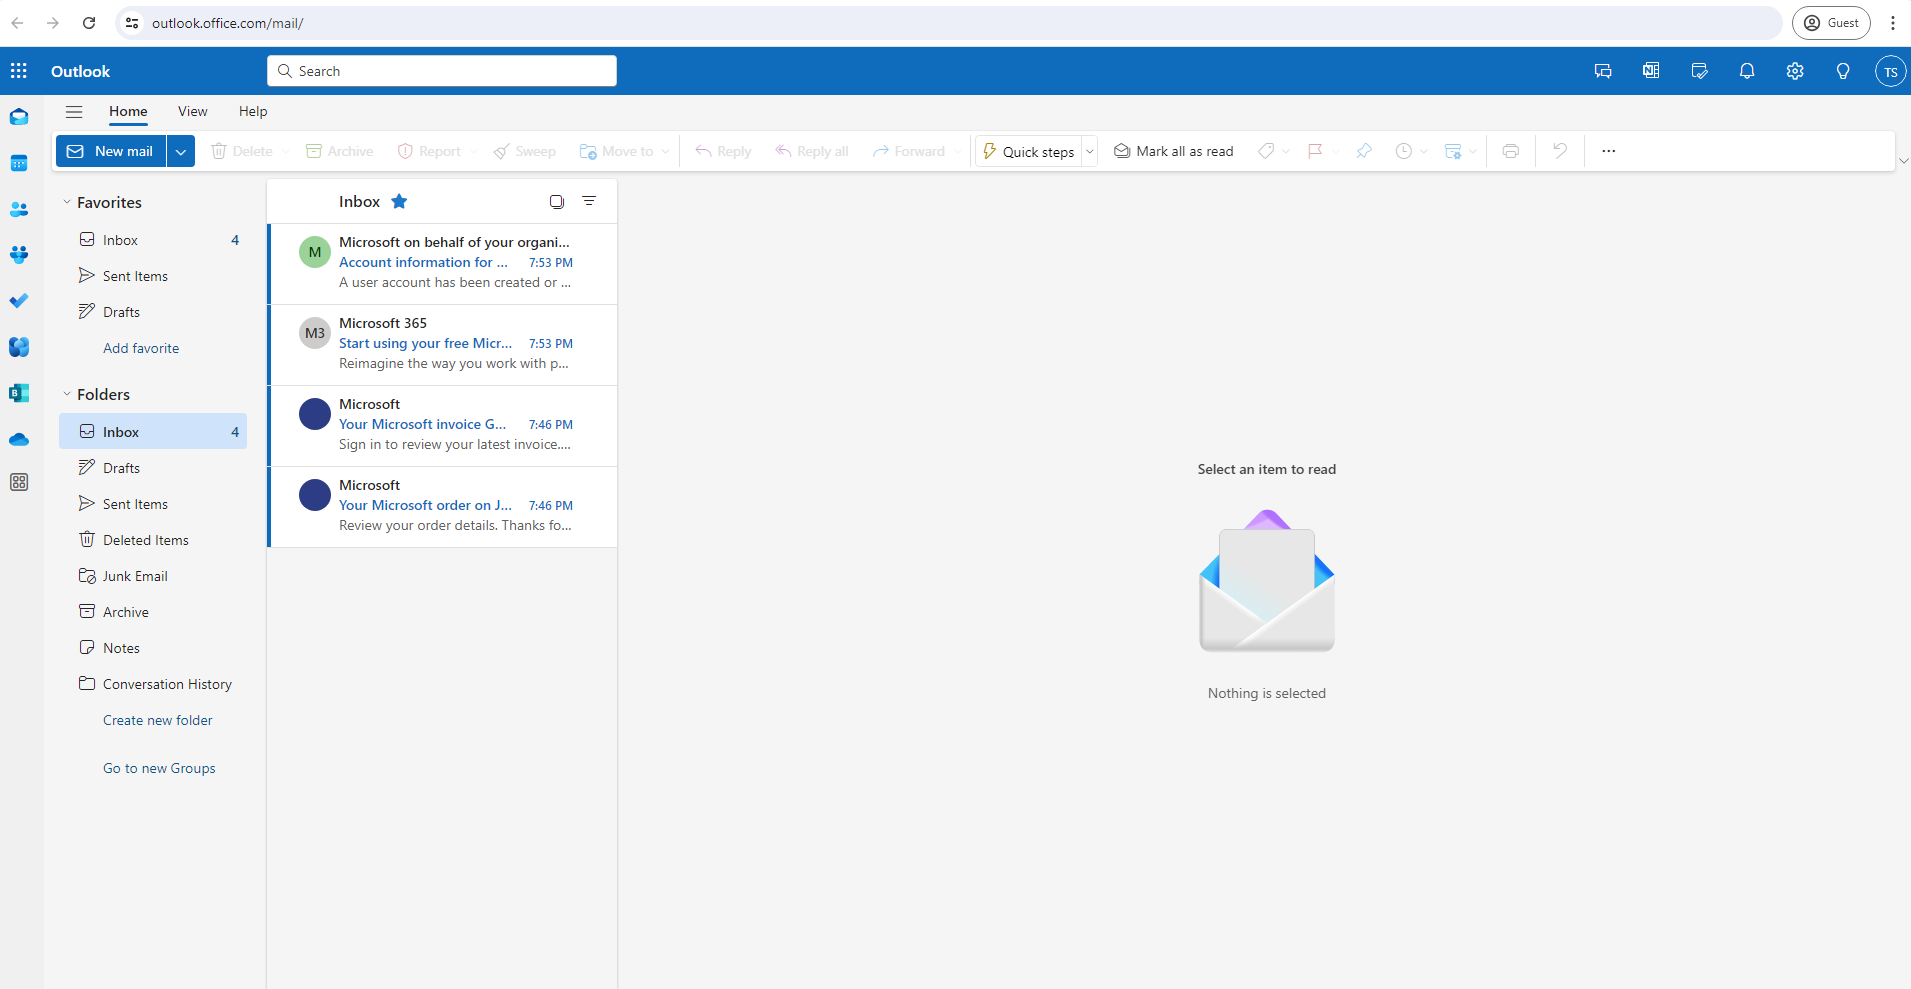
After adding the DNS records to your Domain registrar’s DNS record settings you are officially finished. All that is left is to sign into your new account with the password you preciously set for your admin email.
Conclusion
Creating a Microsoft 365 email with your company domain is essential to growing your business and it also provides a great foundation for your IT infrastructure. Microsoft 365 provides device management tools that can protect company assets by removing access or giving access to users at any given time.
If you would like us to help setup your company email, feel free to reach out to us at (425) 478-0348 or filling out our contact form.