Overview
Managing users and mailboxes in Outlook 365 through the Exchange Admin Center (EAC) is a crucial task for administrators to ensure smooth communication and efficient workflow within an organization. This guide will walk you through the essential steps to access the admin center, manage user profiles, and update mailbox settings effectively. From editing contact information to delegating access, this comprehensive overview will help you streamline your administrative tasks in Outlook 365, ensuring that your organization’s email system operates seamlessly. Let’s dive in and explore how to navigate and utilize the Exchange Admin Center for optimal user and mailbox management.
Step 1. Sign In To Office.com
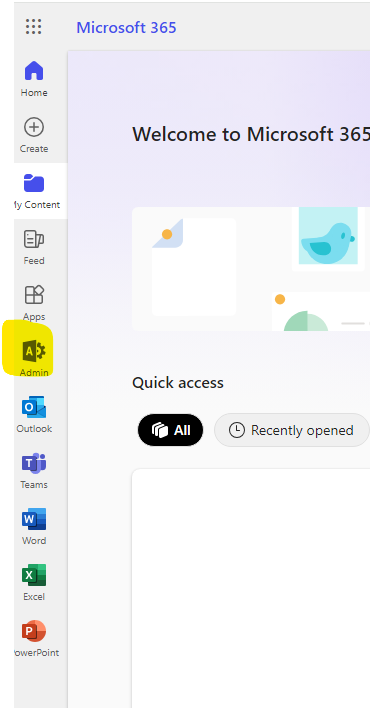
Go to Office.com to access your admin center then click on “Admin”. It should be a gear sign with an “A” on it.
Step 2. Select “Exchange”
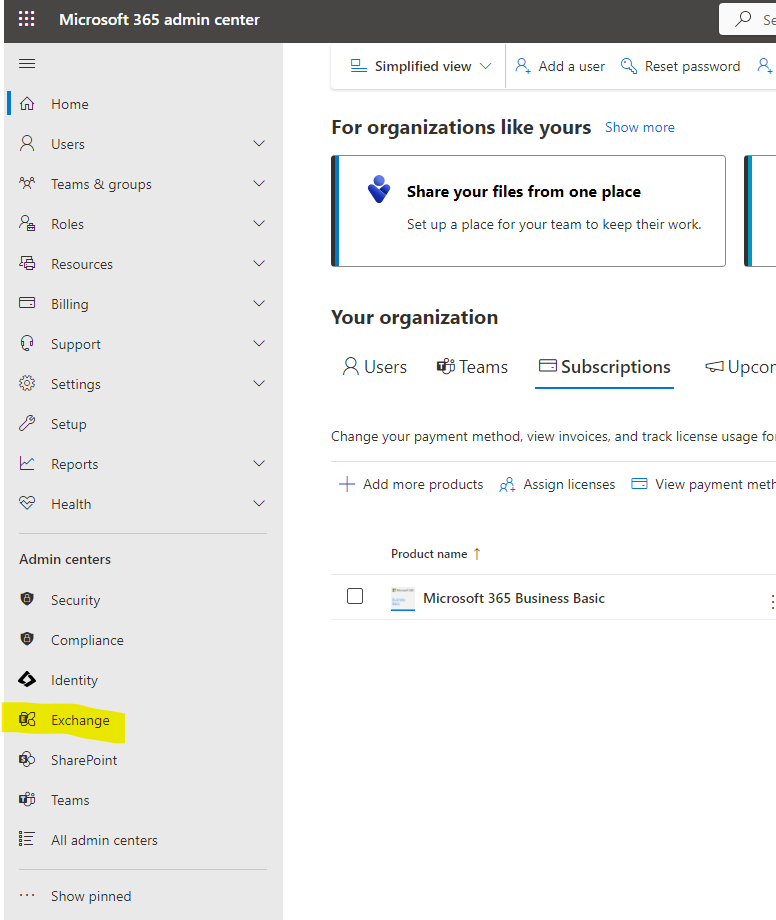
Then select “Exchange” on the left admin panel.
Step 3. Go to “Mailboxes”
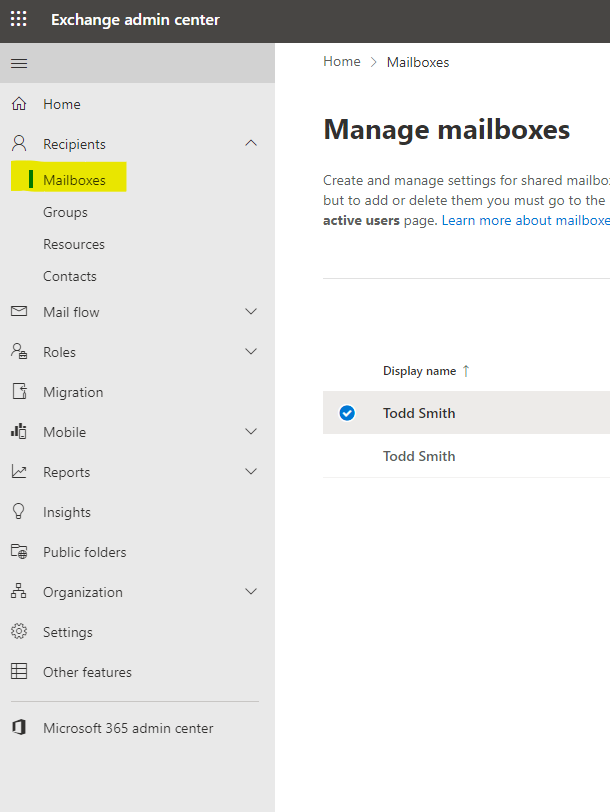
Once in the Exchange admin section click on “Mailboxes” to manage the user profiles and mailboxes.
Step 4. Edit Details
Select User and update details and settings.
4a. In the “General” tab you can edit the contact information.
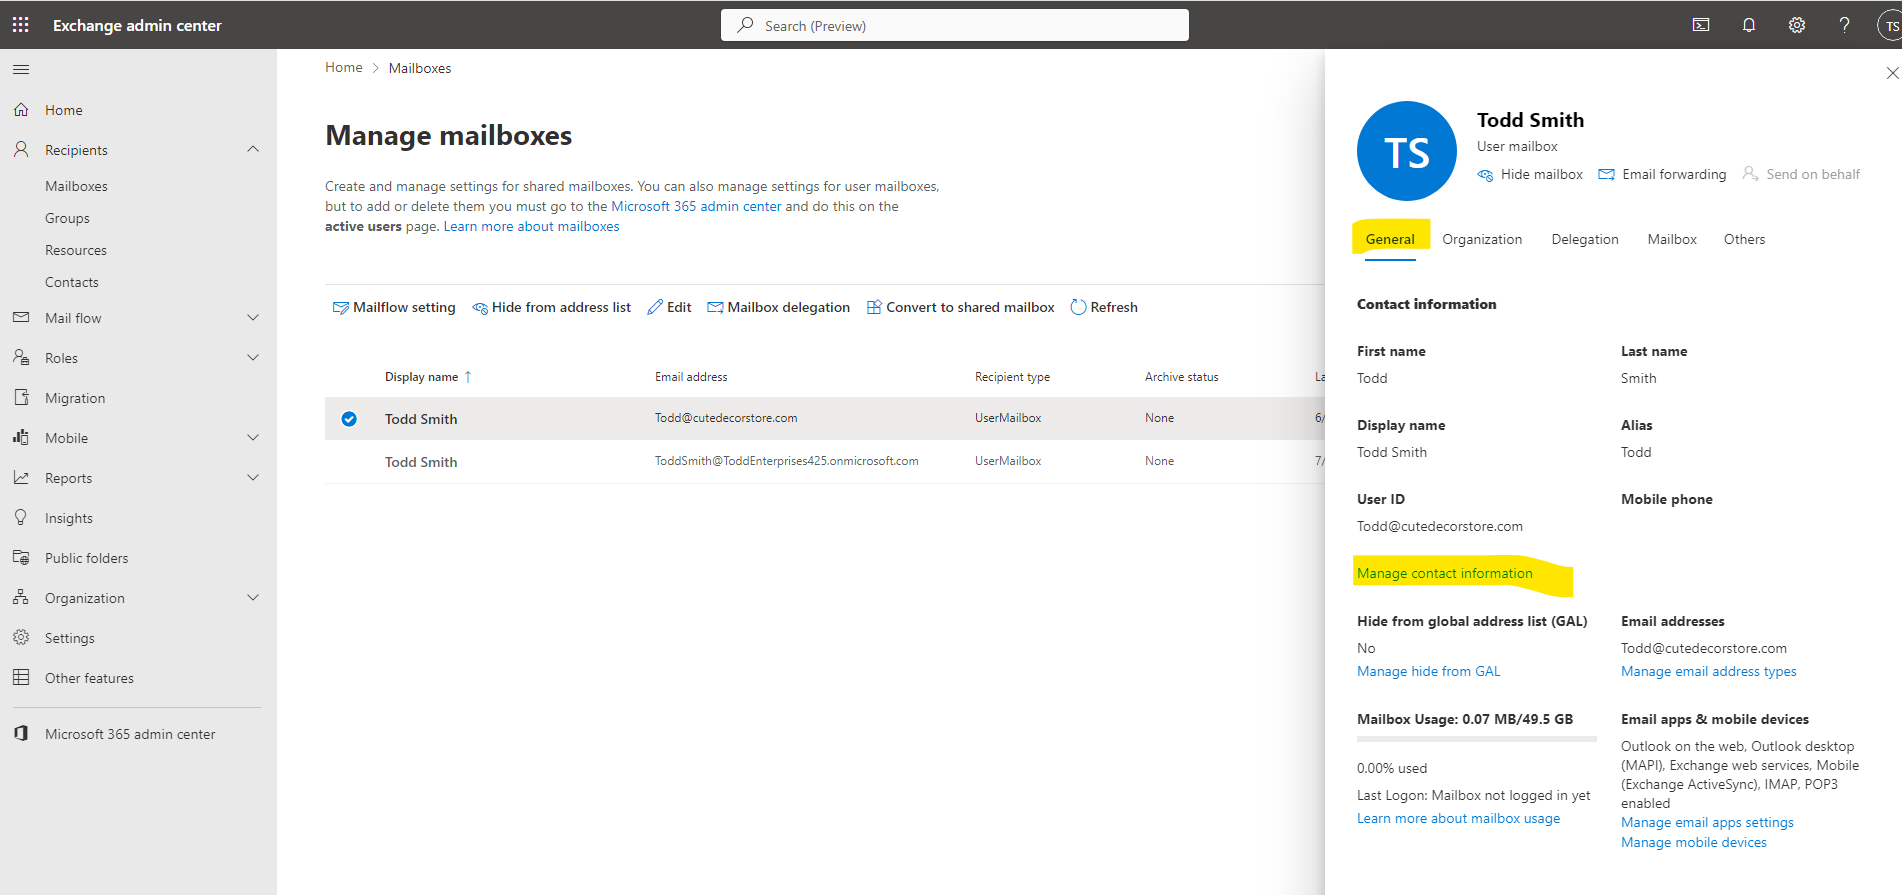
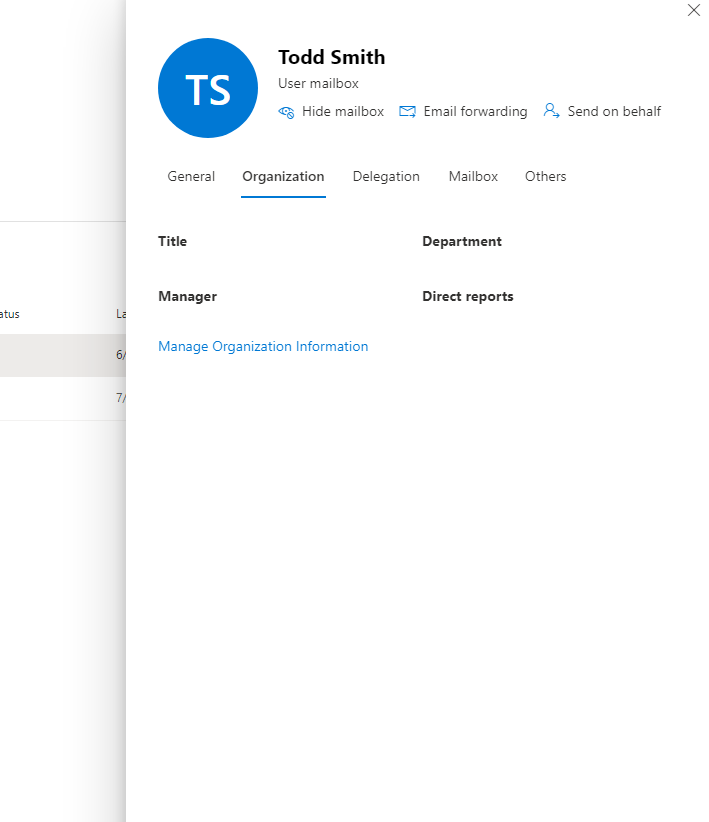
4b. In the “Organization” tab you can edit organization information which includes details like title, department, and other details.
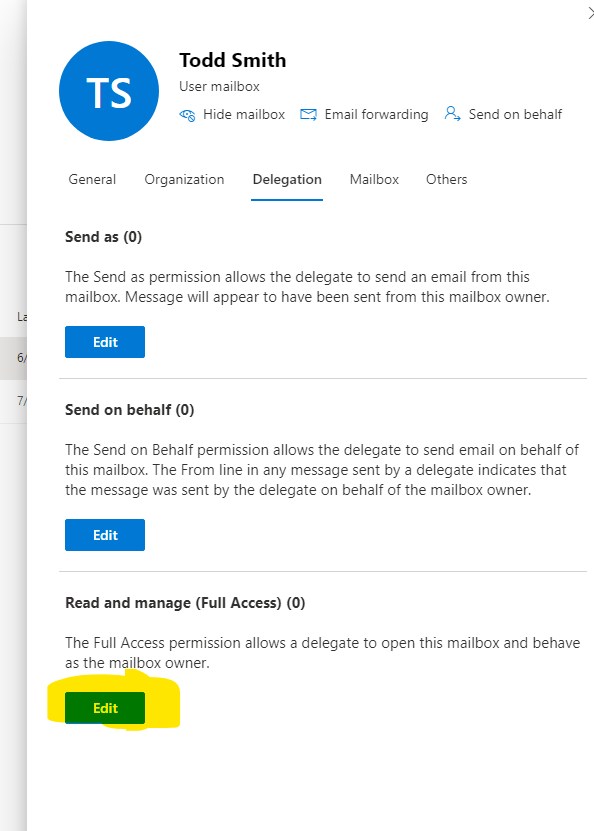
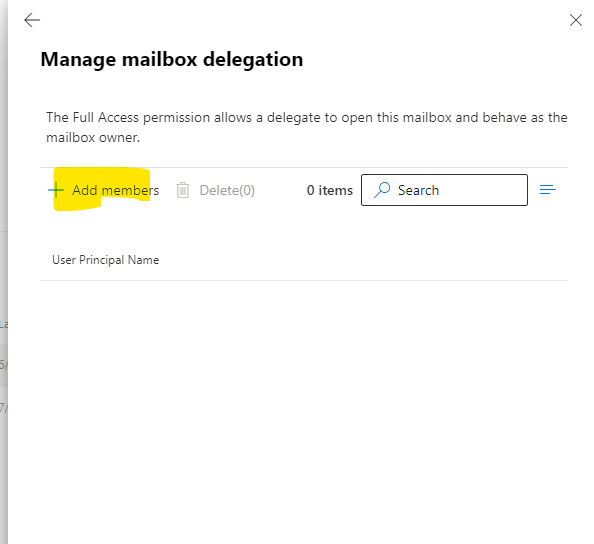
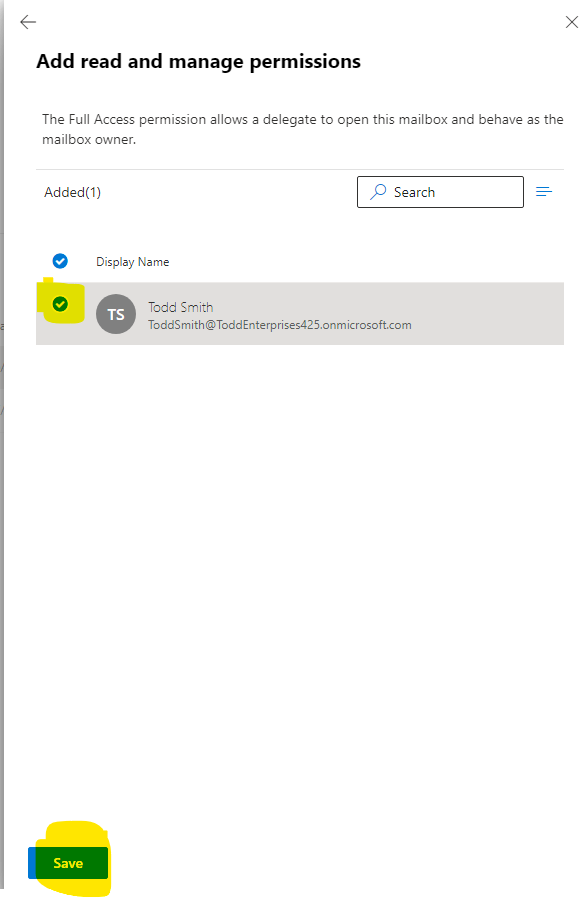
4c. In the “Delegation” tab you can add access or remove access to this mailbox. (if this is an employees account you can add an admins email to the “read and manage” button so the mailbox shows up in admins account when admin is signed in to Outlook)
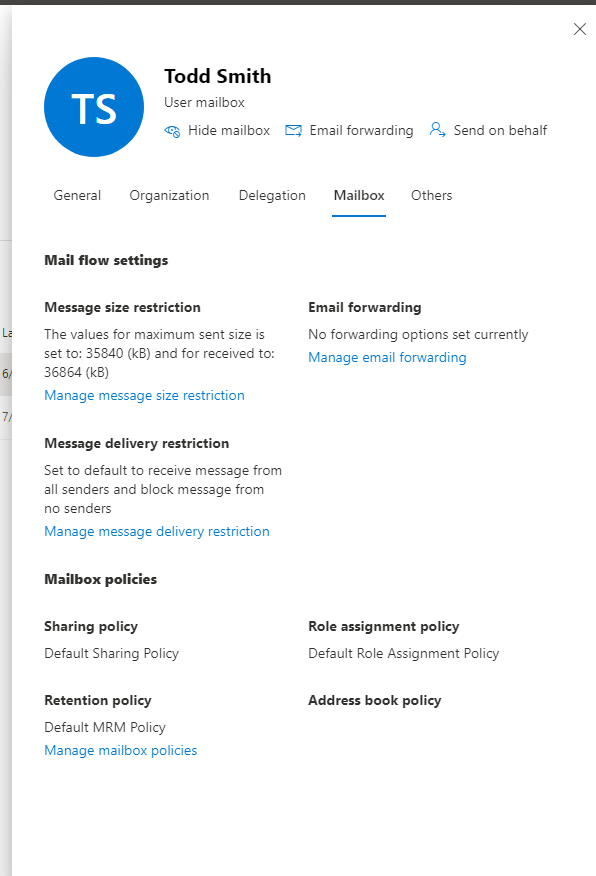
4d. In the “Mailbox” tab you can change the mailbox settings (One example is if an employee is no longer in the company you can forward the emails to a different user)
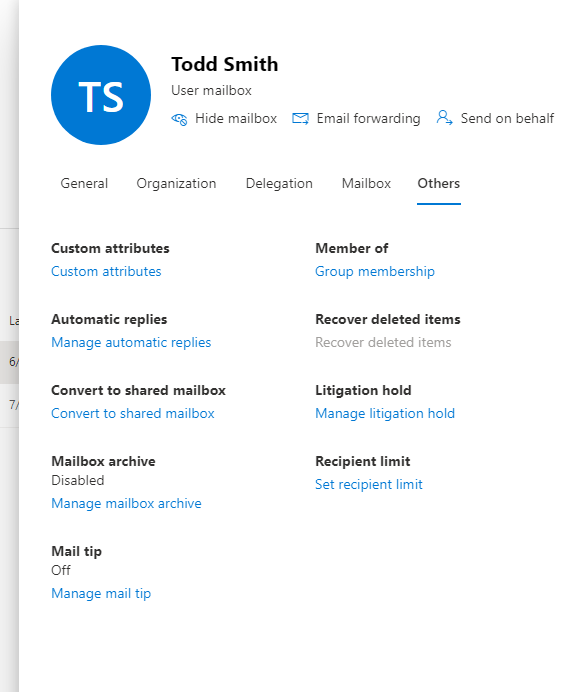
4e. In the “Others” tab you can change other settings including automatic replies and other useful settings.
Conclusion
In conclusion, managing users and mailboxes in Outlook 365 through the Exchange Admin Center is a vital function for any organization looking to maintain an efficient and organized email system. By following the steps outlined in this guide, administrators can easily access and navigate the admin center, update user details, delegate mailbox access, and adjust mailbox settings as needed. These tasks not only enhance communication but also ensure that email management is tailored to the organization’s specific requirements. With these tools at your disposal, you can confidently manage your Outlook 365 environment, fostering a more productive and connected workplace.
If you would like us to help setup your company email, feel free to reach out to us at (425) 478-0348 or filling out our contact form.